Disclaimer!!!
The information provided in this blog is to be used for educational purposes only. All of the information in this blog is meant to help the reader to develop a hacker defense attitude in order to prevent the attacks discussed. In no way should you use the information to cause any kind of damage. Hacking is a crime and I am not responsible for the way you use it.
[Task 1] Deploy
LFI (Local File Inclusion): vulnerability that is mostly found in web servers. This vulnerability is exploited when a user input contains a certain path to the file which might be present on the server and will be included in the output. So this kind of vulnerability might be used to read files from the vulnerable target server (victim).
The main cause of this vulnerability: improper sanitization of user’s input.
When we deploy the virtual machine and access its webserver at http://10.10.208.250, we are provided with the following webpage:

But how to exploit the LFI here?
[Task 2] Getting user access via LFI
To test for LFI what we need is a parameter on any URL or any other input fields like request body etc. For example, if the website is tryhackme.com then a parameter in the URL can look like https://tryhackme.com/?file=robots.txt (file is the parameter here)
Knowing this, we need to find a parameter on the page. For example, when you click on the Contact tab…

…you can see that the URL changed a bit – /home/?page=contact.html part appeared (page parameter with a value of contact.html)
Once there is a chance that the webpage might be vulnerable to the LFI, it is nice to have an assistant for exploitation part e.g. PayloadsAllTheThings
So you don’t need to remember all the important files laying on the filesystem, or be afraid that you forgot any of them.
/etc/issue
/etc/passwd
/etc/shadow
/etc/group
/etc/hosts
/etc/motd
/etc/mysql/my.cnf
/proc/[0-9]*/fd/[0-9]*   (first number is the PID, second is the filedescriptor)
/proc/self/environ
/proc/version
/proc/cmdline
And it not only provides us with interesting files, it also contains LFI/RFI tricks like null byte or double encoding. Definitely check the link.
Okay. We have the parameter and know how to exploit the LFI. The final step is to replace the value with the path to the file that might be present on the server. One of the most interesting files on Linux systems is /etc/passwd file (?page=../etc/passwd):

But as you can see from the screenshot below, it complains about file not found:

Of course there is no such file as /opt/web/../etc/passwd on the target server. We are currently located in /opt/web/ directory so we need to go two levels down first to get to / directory. From there we can access /etc/passwd file.
In Linux, you go one level down in a directory tree by specifying:
..Yep, just two dots. But we need to go two levels down (../..) and then specify the file we want to access (/etc/passwd). When we combine these two parts together…

…the contents of the file are displayed on the webpage:

Bingo! As the passwd file contains user information, we can see all the users on the target server. What is it good for? Very common service running on a Linux system is SSH. And if it has key-based authentication enabled, we can just locate the private key (usually /home/user/.ssh/id.rsa), copy&paste the key, store it on our attacker machine and use it to connect and authenticate to the server as that user.
I can see there is a user account called falcon. Let’t try to include the path to his private key (also called identity file) and see what we get:


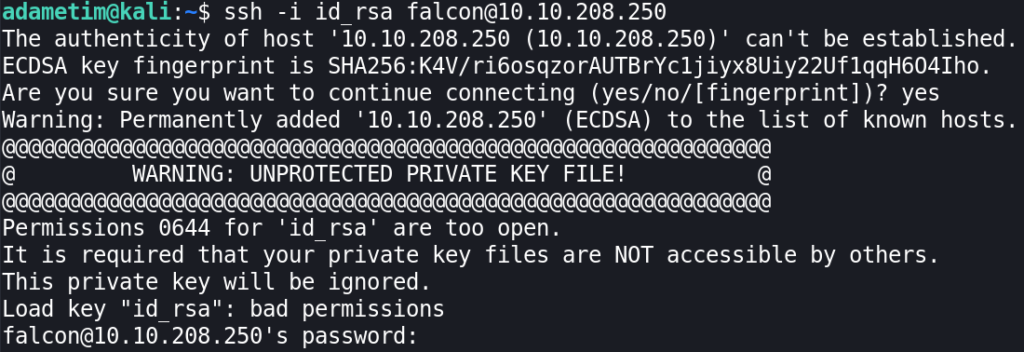
Awesome. We can copy this, save it and connect to the server using:
ssh -i <identity_file> falcon@TARGET_IP
We failed. SSH complains about too open permissions of the private key. Set it to 600 and try again:

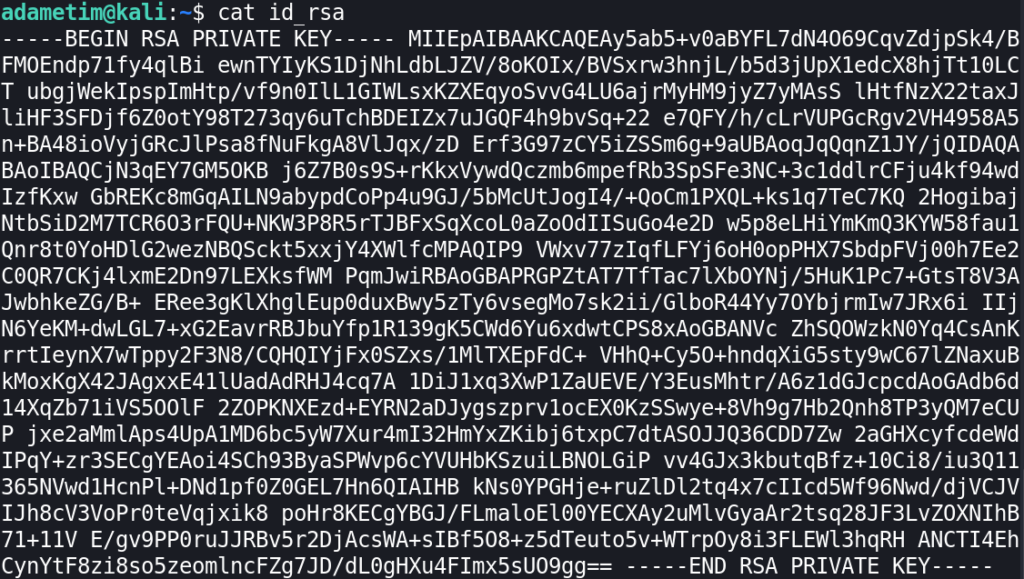
We got another error. Now it’s about invalid format. I looked at the file real quick and found out that it’s just one line of characters:


It cannot be like that. So we need to copy the key again from the website, but this time from the source code to preserve SSH-acceptable format:

Now when we change the permissions again to 600 and try to connect to the target, it’s successful:

So we are on the target server running as low-privileged user. The next step is to aim for the root.
[Task 3] Escalating your privileges to root
In this, we are going to focus on getting root-level access on the machine. This step is also known as Privilege escalation; we are going to escalate our privileges from a normal user to a root user (with the highest level of system privileges).
I always take a real quick look if the compromised user can run anything as a root user, using sudo:
sudo -l
We found out that we can run /bin/journalctl command with privileges of root admin acount without even using our own password (NOPASSWD). Which is good as we don’t know it.
When you find any binary that you can run using sudo, take a look at GTFOBins. It contains a curated list of Unix binaries that can be used to bypass local security restrictions in misconfigured systems. In other words, to help you with privilege escalation on Linux systems.
Locate journalctl section and you can read there:
If the binary is allowed to run as superuser by
sudo, it does not drop the elevated privileges and may be used to access the file system, escalate or maintain privileged access.
And you can also find there a list of commands to run to escalate the privileges:
sudo journalctl
!/bin/sh
And if you follow the steps, i.e. run sudo journalctl command and once you are in journalctl, type !/bin/bash…

…you will get the root access!
I hope you enjoyed this challenge as much as I did. It was fun trying to get access to the target system. Thank you for reading this and see you at the next post!